
Hello!
I'm back today with the promised tutorial for you sharing how I get my wood mounted sentiments (especially, but any wood mounted stamps really) stamps straight. Now, before we start, I'm sure loads of you all know how to do this already and if so please feel free to skip this tutorial and scroll down for cards and other fun stuff of course but... if you are new to stamping maybe, or always struggle getting your sentiments straight then I hope this will be of some help to y'all!
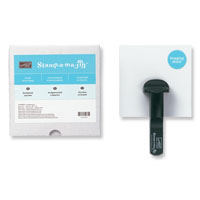
So, to start you need your Stamp-a-Ma-jig (handle only) and if you have Grid Paper it makes this a whole lot easier too. Lined paper would work in a pinch though.
I'm using the Good Greetings stamp set here, it's free at the moment with orders over £200 so if you fancy a crafty party then please do get in touch and we can get you your set! Also available in my online shop too. Offer ends 31st October 2014.
.JPG)
As you can see I had mounted most of my set before I thought it might be useful to take a few pictures ;-)
Part #1
Start with your Stamp-a-ma-Jig handle.
Note: the edges of the SAMJ run along the lines on the grid paper
.JPG)
So, mount your stamp gently onto the block, getting it as straight as you can by eye,
*Do not press the stamp on too hard at this point, you may need to adjust once tested*
add the sticker (so you know which way is up!)
ink lightly and test using your SAMJ handle...
(Lock into the corner, slide down, press gently, slide back up)
.JPG)
... To see if your stamp is straight! Yay! This one is perfect!
If it wasn't straight then simply adjust (since you only adhered it gently) and re-stamp, testing it using your handle until it's perfect.
Now, when you stamp on your card you know if your wooden block is parallel to the top, bottom or side edge of your card your sentiment will be straight!
.JPG)
Part #2
So, You know how I always say you need to make your stamps work for you, this is the perfect case in point.
This sentiment said "give thanks" which is lovely but here in the UK not really something we would use on a card. Sooooo I knew I would use "thanks" a whole lot more but I also wanted to keep the "give" too and instead of always having to use a marker to ink I simply cut it apart! Eeek! It's OK though, they are fine ;-)
OK, the important part of mounting these stamps. Just in case you want to use a SAMJ with this sentiment you need to make sure you mount the main part just like before...
.JPG)
...check it's straight and then...
.JPG)
Think about when you want to use the SAMJ for the smaller sentiment. You need to have the "thanks" sticker to the left where the block goes down the handle so the "give" needs to go this one way in particular.
.JPG)
I suggest taking the block and locking it in to the SAMJ handle, adding the sticker then adding the stamp to match, no room for mistakes this way! Yes, I learnt the hard way!! ;-)
.JPG)
two stamps for the price of one!
.JPG)
and here's a little sneak peek at tomorrows card with one of the sentiments from Good Greetings,
.JPG)
Well, I hope this tutorial helps some of you with your straight sentiments ;-)
And if you have any questions or queries or suggestions for anything else you would like to see then please do Get in Touch!
Thanks for looking today
Stampin' Hugs,

Products Used to create this project:


No comments:
Post a Comment
Thank-You for any comments you may leave, I appreciate the time it takes to do so and I love to read them all :)